Easy Yet Enjoyable Robot
(WIP 09/2015)

Plus “Eyer” means;
Ey´er
n. 1. One who eyes another.
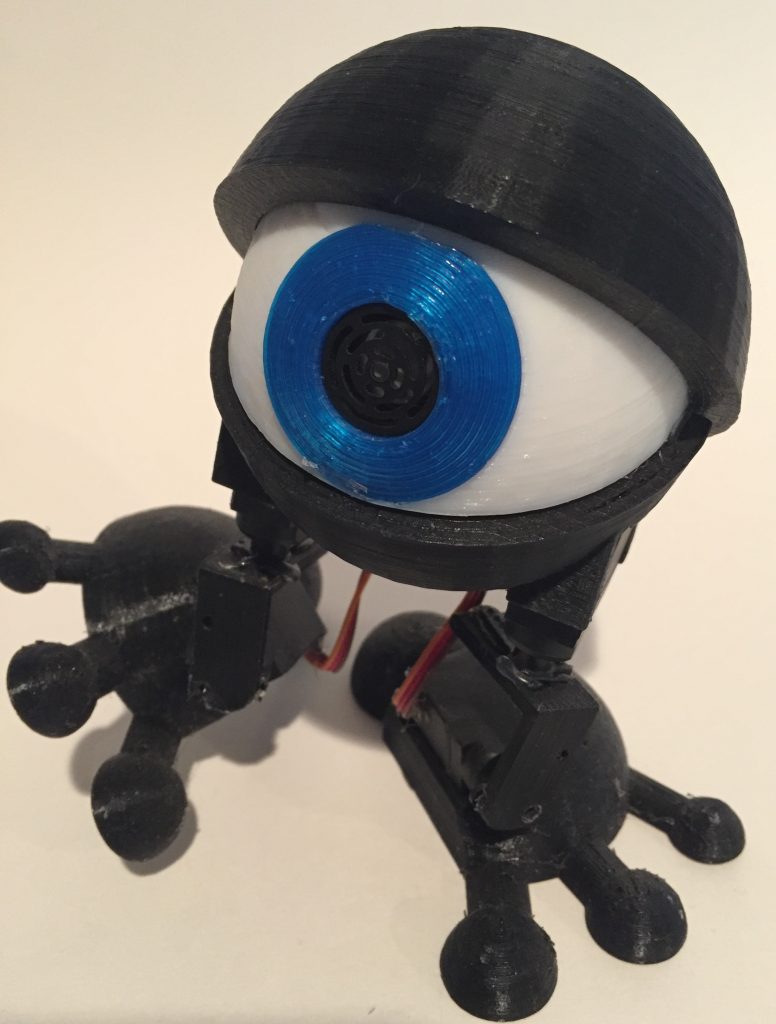
Which he is obviously doing… Plus he is a looker no?
Overview
Actually I started this back in 2014 sometime during the heyday of a
new 3D printer. This is obviously a derivative of FrankNeon/DJUltis
Arduped and K’s BoB design and in the same line as my original TED four
servo walker. Sure the feet are directly from Frank’s design.
3D Printing
The print was pretty easy from what I remember. The design is pretty
good and printed for me at least without issues. The shell is pretty
thick however so unless you lighten up your fill it may be a bit heavy. I
had more black filament than anything else so he’s black. I like blue
eyes so the iris is blue.
Brains and Power
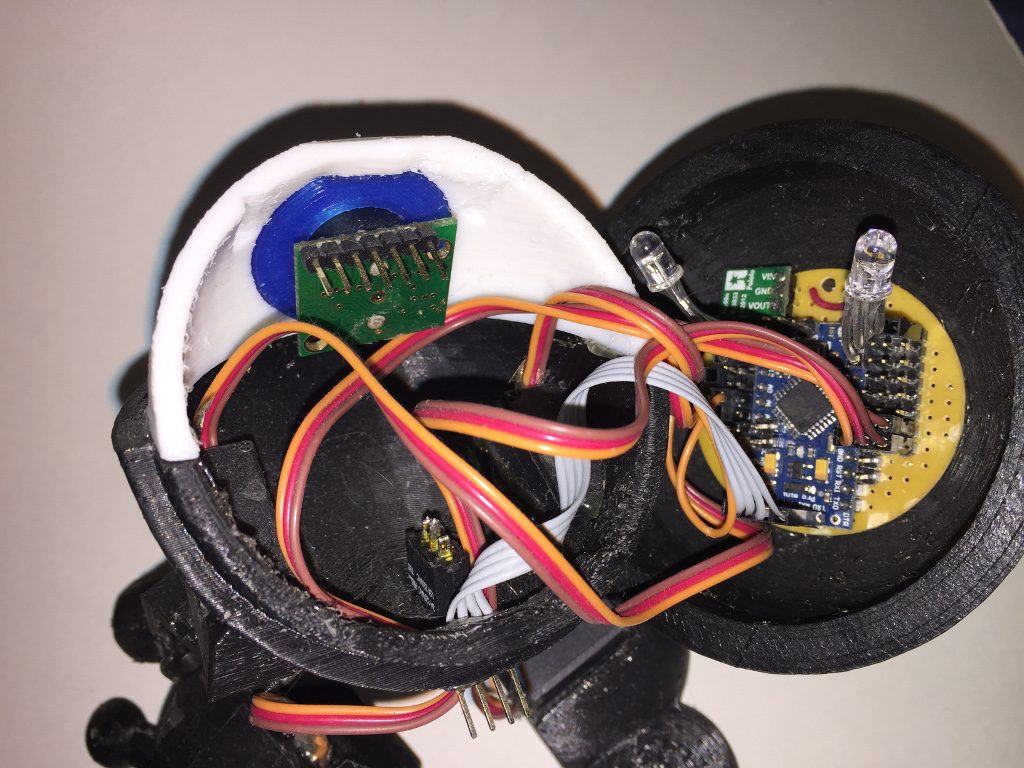
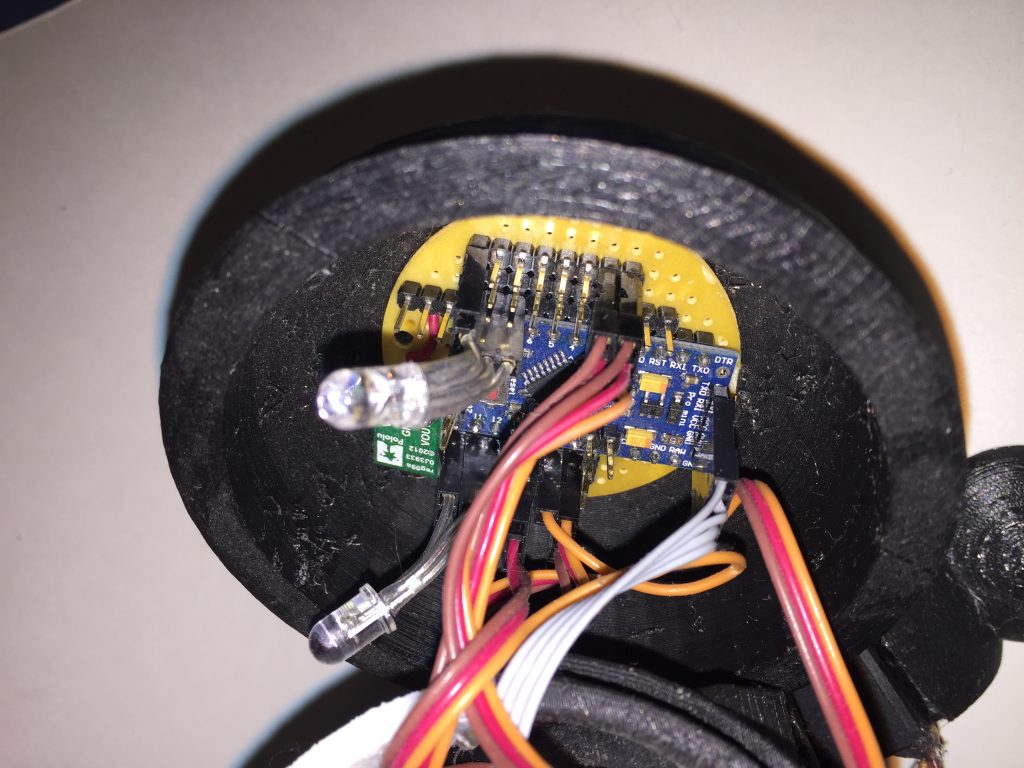
The brain is a normal old 5v ProMini that I put on a modified
circular breadboard from Radio Shack and a Pololu regulator that I’ve
used on most of my bots. It will handle the four servos, ultrasonic
sensor and ProMini. Any more servos and it’s too much though. An EZ
Botics ultrasonic single unit sensor is used in the pupil but I haven’t
actually hooked it up yet. I’ve had the sensor for years now so hope it
will works.
The Fitting

The biggest challenge is getting all to fit in that little round
head. I thought Sir Robert/BoB was a challenge but this guy is even
smaller brained and challenging. A 680MaH 9v battery will fit in there
though so that is the plan for power. Obviously he is not going to be
running around all day but should be good for a few minutes of fun. You
can see the perf board mounted at the top of the head and the RGB LEDs
plugged into the ProMini undershield and pointed towards the front of
the eye. They show through the whites in the eyeball allowing for some
“mood” displays with the different colors.
Turn Him on and Power Him Up

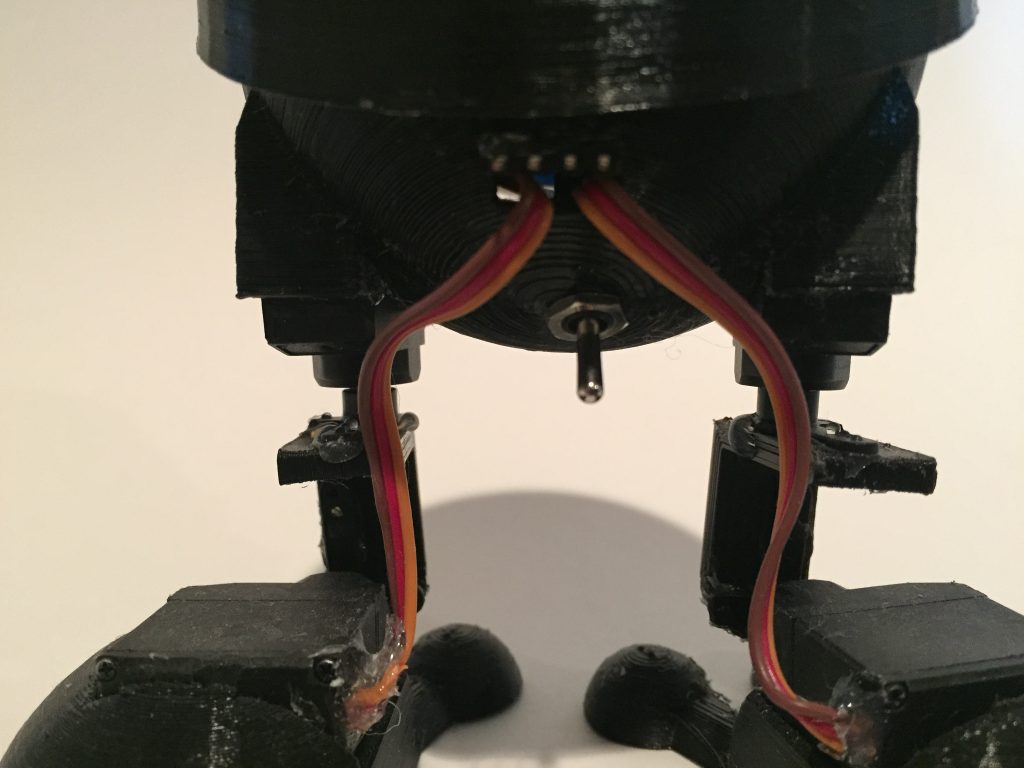
I needed a power switch and programming port on the outside
somewhere and decided to use my standard header connection I use on the
other bots to make sure it’s easier to reprogram. It’s just a four pin
header with ground, Power, TX and RX pins but is the same as the pro
mini pin layout.
Switching him on is a bit different. I put a toggle switch on the
bottom and REALLY thought about put the switch up front so you could
flip it UP to turn him on and down for off but ended up chickening out
and putting on the back side. Now it’s his tail instead of… well, I’ll
leave it at that.
Next Steps
Really the next step is to take my TED code and change it up a bit to use the sensors on EYER. Just never did that as I bounced off to other hobbies. As such he won’t be anything special but he should be a lot more durable than TED and NED are which are easily damaged.
Will update here as time allows.
– Stephen

